

How to Connect Covertkit to Your Squarespace Website: So You Can Deliver Your Email List Freebie (Lead Magnet)!

What we know in 2023 is that as a small business owner, one of the best ways to sell your services and products is to create an engaging email list. Not only do you get direct access to customers who are already interested in what you offer, but you also get the added bonus of skipping the constant learning and re-learning of ever-changing algorithms to make sure the right people are seeing you’re content. (sign me up!)
If you’ve recently decided to create an email freebie to start collecting emails and growing your list, you might have noticed that ConvertKit is not listed as a storage option in Squarespace.
And if you’ve already signed up for ConvertKit, I know that signing up for another newsletter tool like Mailchimp or Mailerlite is not at the top of your to-do list…
… because, well if you’re anything like me, you’ve already poured hours into choosing the right platform for your email list, and you rather be spending your time on growing your list versus figuring out another tool (the perks of running an online business, am I right?).
The good news is that with a couple of additional steps, you’ll be growing your email list in no time!
In keeping true to saving time (see I’ve got your back), I went ahead and wrote out the quick notes for connecting ConvertKit to your Squarespace Website:
Quick Notes
Create your freebie & download it as a PDF file — Canva is great for creating workbooks and checklists, both of which make great freebies!
There is no click-of-a-button, “simple” way to connect ConvertKit to your Squarespace website, however, you can connect Convertkit through a couple of additional steps vs. using Squarespace Email Campaigns and Mailchimp (both of which are quick options available in the pop-up promotions tab & is included in all Squarespace websites).
Steps Overview:
Create a landing page in Squarespace — I like being able to create everything in Squarespace for easy customization, personalization and the ease of having everything in one place
Create a new form in ConverKit
Add your new form to your landing page
Enable Squarespace’s promotional pop-ups and link to your landing page
Automatically deliver your freebie to new subscribers!
This blog post was written in September 2023 for Squarespace 7.1, you might have noticed that Squarespace has changed the settings around just a tad at the time of reading this post.
How to Connect Convertkit to Squarespace’s Promotional Pop-up Using a Landing Page and ConvertKit Form
You’ve excitedly decided that ConvertKit is the right tool for your email newsletter.
You’ve gotten your Squarespace website together, and you go to connect ConvertKit to your new promotional pop-up only to realize, that ConvertKit is not listed as an option.
Did your heart just sink a little?
Yeah, I know, same.
Spending hours researching, comparing and ultimately deciding on a new tool to introduce to your small business toolbox only to find out it’s not as simple as you thought to connect it with what you already have set up is a little disheartening.
When I learnt I had to create a landing page (even though I’m a web designer), the term landing page had me low-key freaking out.
I didn’t have time to learn another skill just to get started with my email list. Here’s the thing though.
I already put the time and energy into creating my website on Squarespace, and I was proud of it! I had already put the time and energy into picking the right tool for my small business email list, so I bit the bullet and decided to go all in and connected ConvertKit to my Squarespace site.
The best part is I learnt how to build landing pages, and I kind of had fun doing it (but let’s be honest, I kind of love figuring out new tech!)
If you can relate to my story, you’ve probably spent some time in Squarespace’s promo pop-up space, saw that ConvertKit wasn’t a storage option, let out a *big sigh* when you realized this is turning into more than you originally had thought, then turned to Google and found you’re way RIGHT here.
This is probably the screen you saw that started your new search:
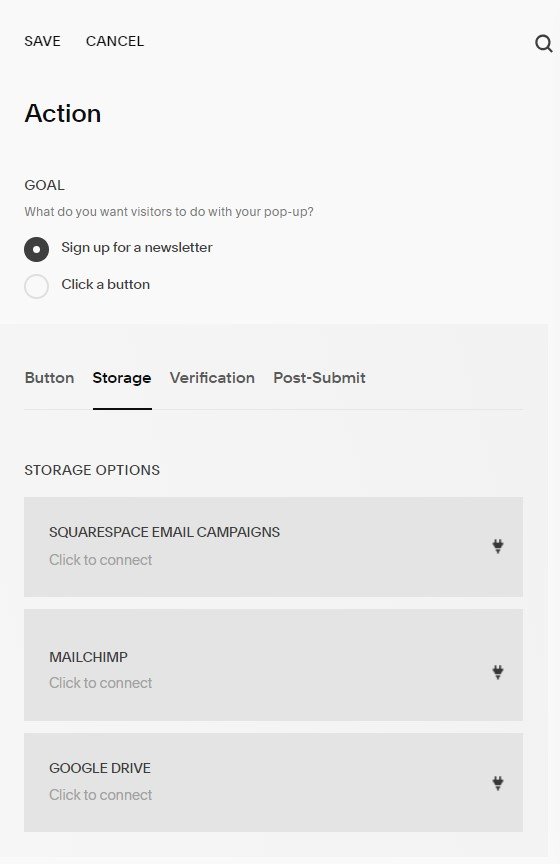
The options available are to either connect to a Squarespace Email Campaigns Account, a MailChimp Account or to connect to Google Drive…
… Not super helpful.
Tip: There is a hack to connect ConvertKit using the first option of “Signing up for a Newsletter”, involving creating a Google Drive Spreadsheet and creating a new zap from Zapier
Today, we’re tackling connecting ConvertKit using the second option: “Click a Button”, and I promise, it’s not as hard as it sounds!
Creating a landing page in Squarespace
First things first, we are going to create your new landing page.
Go to Website > Not Linked and select the + button to create your new page.
We are creating this new page under the not-linked section of your Squarespace website because we don’t want the page to always be available like with the navigation pages - Home, About, Portfolio, Contact, etc. We want visitors to access this new page only when they click the download button via your ConvertKit form to access your freebie.
When creating your new page, the options are to start with a blank page or to select a layout.
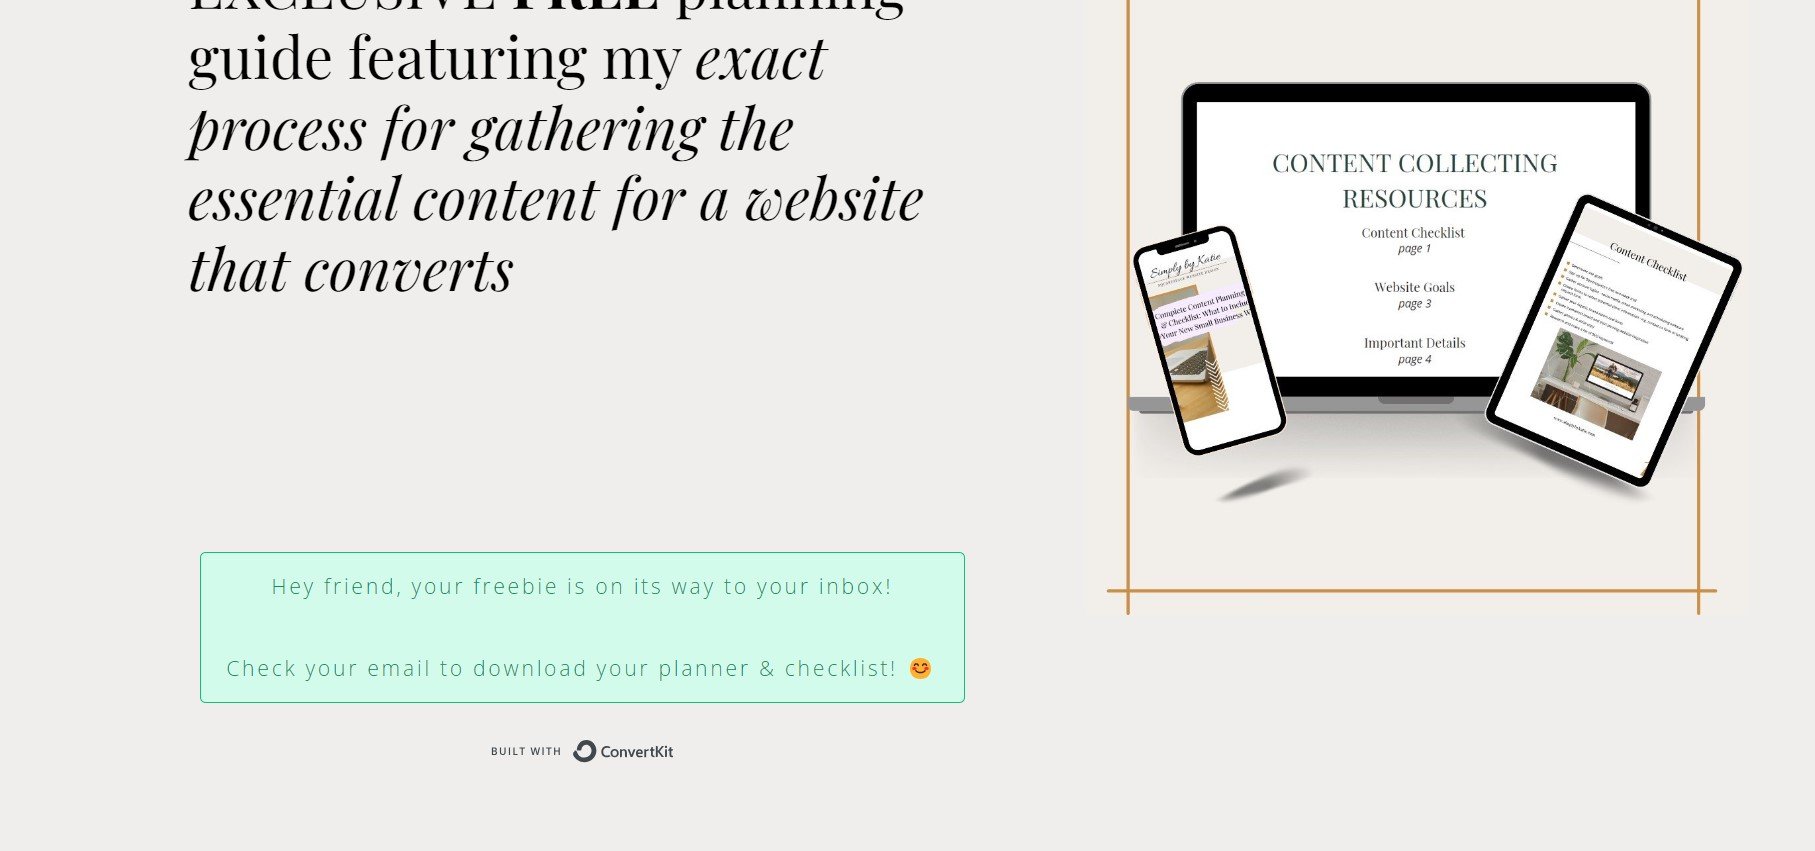
For this example, we will create a simple landing page with a heading, a photo of the freebie and a code block with your ConvertKit form.
See the example below:

To recreate a similar landing page to the above example, take these steps:
Create a new blank page
Add a text block and add in a description of your freebie.
Next to the text block, add an image block and upload an image of your freebie.
Underneath the text block, add a code block — this will be where you add in your forms HTML code (steps are included below!)
Tip: You can use Canva to create mockups of your digital freebie displayed on a computer or mobile devices
Add a new image to your Canva graphic
Select “edit photo”
Scroll down to “apps” and select Mockups

Steps To Creating A Simple Form In ConvertKit (To Then Be Added To Your New Landing Page)
Log into your ConvertKit account
Head to the Grow tab and select “Landing Pages & Forms”

Select the red “Create New” button under the Landing Page & Form Signups graph and create a new form
You’ll be prompted to choose how your new form will be displayed on your landing page.

For my landing page, I selected “Inline” and select the “Clare” template

In the top left corner, beside the pencil icon, name your new form.
Hit the + button to add the subscriber's name as a custom field

Feel free to play around with the settings to brand the form to your small business branding, for example, change the HEX color code to change the automatic font color.
Preview how your form will look at anytime, by selecting the “Preview” button.

Form Settings
Now let’s set your forms settings so that when a new subscriber downloads your freebie they will receive a “Thank you, you’ve been subscribed” note and the pdf of your freebie will be automatically delivered to their email (yay for automation!)
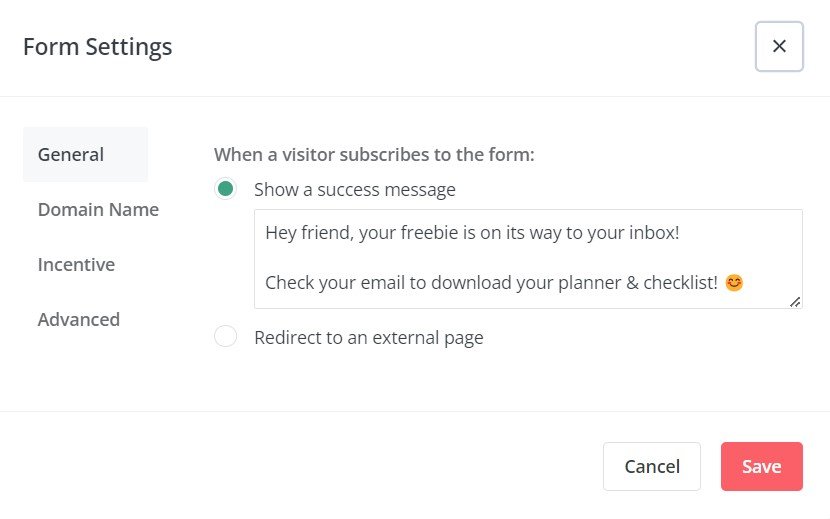
Under the “General” tab, you’ll have the choice to either have a message immediately displayed, or, you have the option to redirect to a new page.
If you want to keep things simple, go with having a message displayed once a subscriber has submitted the form.
One reason you might want to redirect to a new page is if you want to add personalization to your thank you message.
For example, adding a short video with a message from you.
This could be a great chance to introduce what to expect next, like “Check your email for your new freebie!” and “make sure to subscribe to my YouTube channel.”
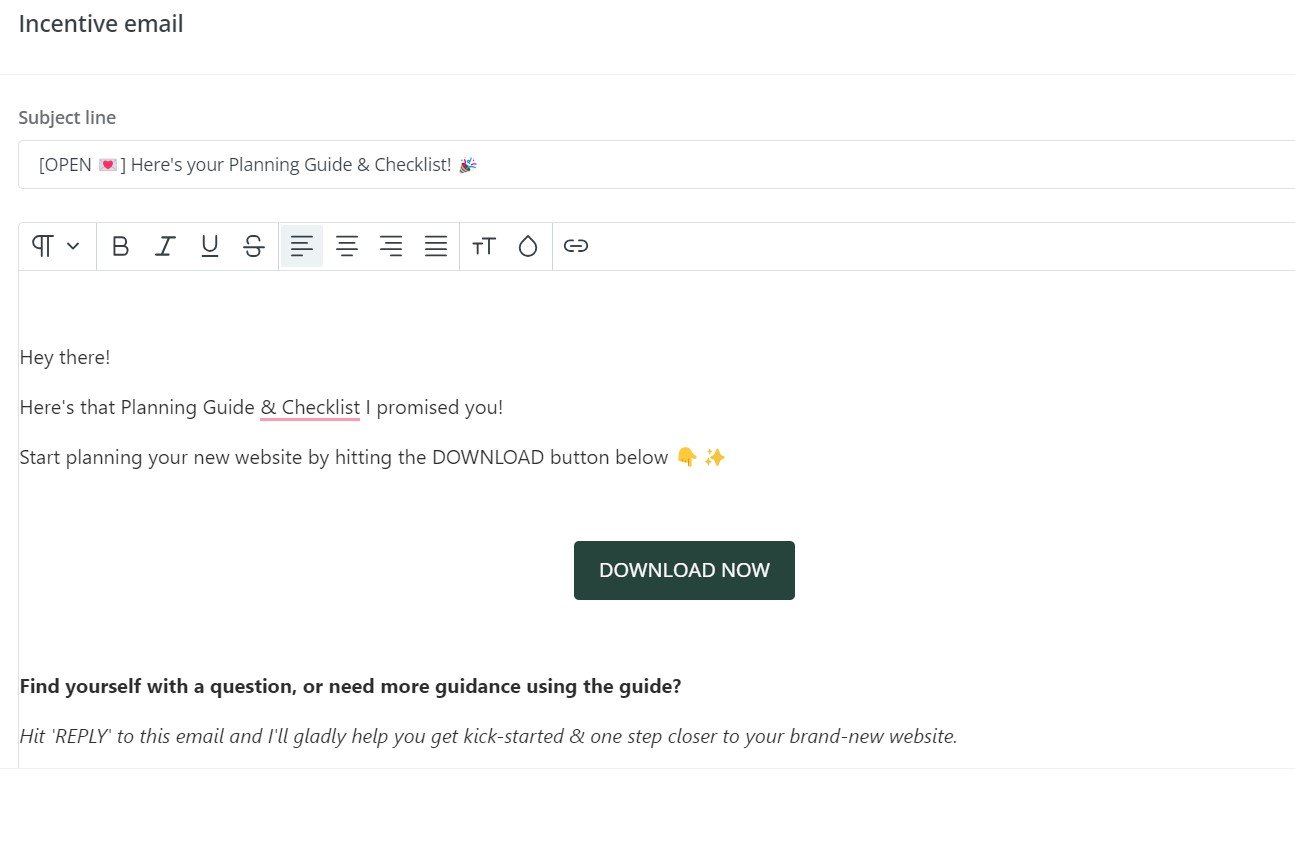
In this example we don’t need to pay any attention to the “Domain” tab, let’s head right over to the “Incentive” tab to upload your freebie.
The send incentive email box should already be checked, so move on over to “Edit Email Contents” and click the button to write your personalized message.
Continue to personalize, including updating the button color and hit save!
Then select “Download” and add in your freebie by selecting the “choose a file” button
Under the “Advanced” tab, select what action you want to happen once the file has been downloaded.
I have the option to still show the form after it has been submitted, and you’ll see that my custom message (this is the message typed in under the general tab) is displayed instead of the form submission.
Add ConvertKit Form To Your Landing Page With A Code Block
Code block instructions: On your landing page, you are going to add a new code block. Go back to your ConvertKit form and grab your HTML code by selecting the red “Publish” button and copying the HTML code.
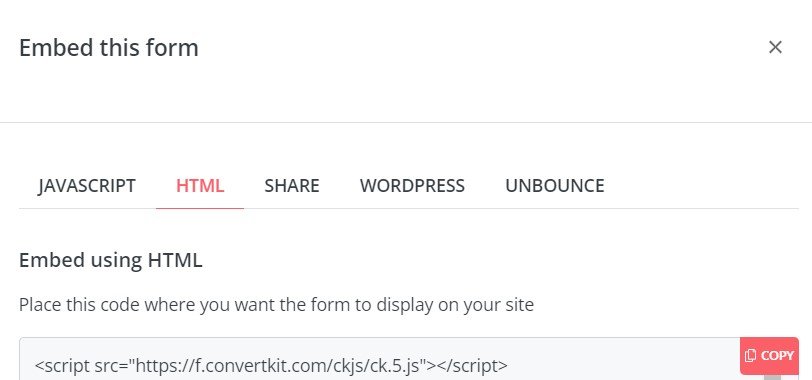
Back to your Squarespace page, paste the code into the code block by hitting the edit button (the pencil icon), and hitting save.
Tip: If you are on the free plan of ConvertKit the “Built with ConvertKit” message will show under your form. To remove this from your form you’ll need to upgrade to the creator plan.
Steps To Add Your Landing Page To The Squarespace Promotional Pop-up (and Start Building Your Email List)
Open up your website on Squarespace, and head over to “Marketing”
Under ENGAGEMENT, select “Promotional Pop up”

In the second option under Marketing, you’ll see a button called “ACTION”. Click on it (it’ll grey out when you hover above the button) and you’ll be able to select the goal of your pop-up.
For the purpose of connecting ConvertKit, select “Click a button”, and enter the text that you’d like to show up on your button.

Tip: For an added SEO boost, include your keyword in the link text of your button. For example, instead of “Download Now”, write “Download The Free Website Checklist Now”

Take the next step and plan your small business website!
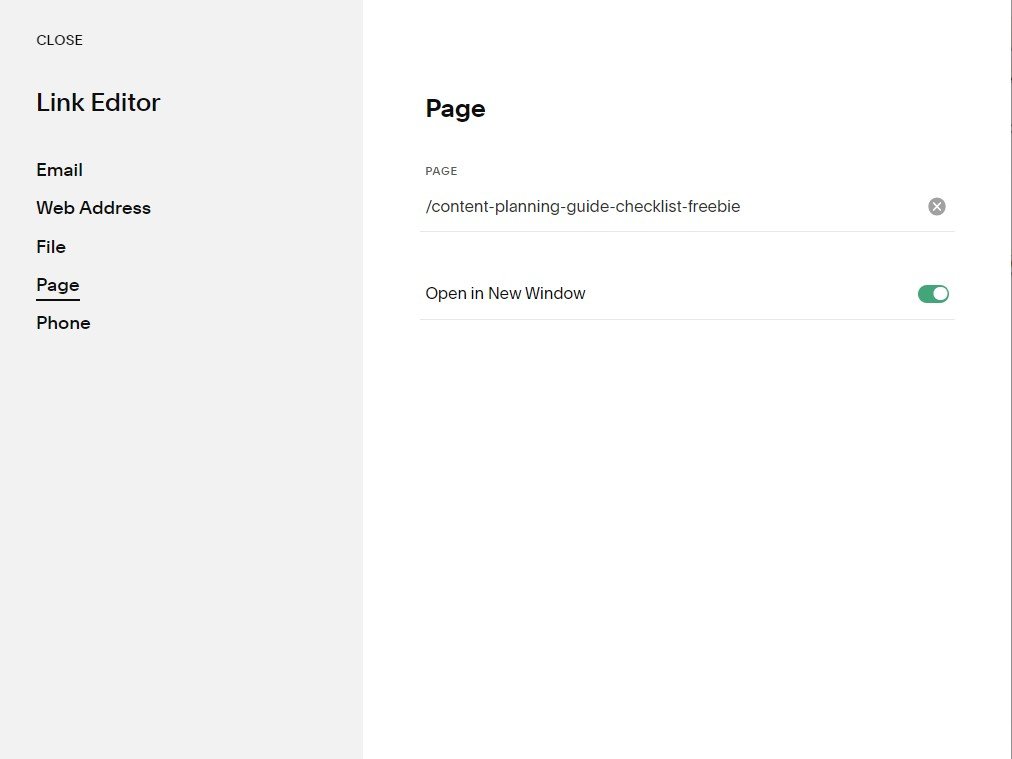
Then select the gear to the right and this is where you are going to connect your landing page
Under the Link Editor, select “Page” and click on your landing page.
That’s it! Now you can send your welcome sequence and connect with your new subscribers!
Steps Recap: Connecting A Landing Page With A ConvertKit Form To Squarespace’s Marketing Promotional Pop-up
Create a landing page in Squarespace
Create a new form in ConverKit
Add your new form to your landing page
Enable Squarespace’s promotional pop-ups and link to your landing page
Automatically deliver your freebie to new subscribers!
Can I connect ConvertKit to my Squarespace website without a landing page?
I was wondering the exact same thing, because well, that’s a lot of additional steps that I wasn’t expecting to take.
When doing a little research of my own, what I found is that where MailChimp and Squarespace Email Campaigns can be directly linked to the promo pop-up, there is a hack to connect ConvertKit by connecting a Google Sheet and then creating a zap in Zapier that links a new subscriber’s information into ConvertKit.
Should I switch to MailChimp or Squarespace Email Campaigns to save myself the headache of connecting ConvertKit?
Oh, do I ever sympathize with wanting to make the switch because sometimes figuring out the tech is overwhelming and well, time-consuming!
Just like I tell my clients,
I know it’s super tempting to move over to a new tool because it makes things easier to connect now, but if you end up outgrowing the platform, the “quick fix” might cause you more headaches down the road.
What I would recommend is, first do your research on the different tools and confirm which one best fits you and your growing business. Each platform is ever so slightly different and offers different pricing, customization and automation functionalities.
Something I’ve done when I haven’t been sure of what tool to use in my business is to sign up for a free trial and test out the different features before making my final choice.
Looking to skip past figuring your way through building your new website from scratch?
Simply by Katie offers professional website builds specifically for small businesses (The Simply package included connecting all the different tech pieces like connecting ConvertKit to your website 😉).
Find out more about working with Simply by Katie by visiting the Work with Me page, linked here for you, and book a quick 15-minute consult call!
You might also like to read….
Five Quick Tips To Find Inspiration For Your Small Business Website
10 Reasons Why You Should Host Your Small Business Website With Squarespace
Choosing A Template In Squarespace 7.1 For Your Small Business Website: 2023 APPROVED”
Activities To Do With Kids During The Summer So You Can Still Run Your Business (Work From Home)
7 Unexpected Lessons I Learned From Starting A Small Business As A Stay At Home Mom